Create a Kubernetes Cluster
This document describes the complete process of creating a Kubernetes cluster through the Portal console, including the meaning, default values, and constraints of each form field.
Create a Kubernetes Cluster
This document describes the complete process of creating a Kubernetes cluster through the Portal console, including the meaning, default values, and constraints of each form field.
Prerequisites
Before creating a cluster, confirm the following:
- The target region and host machine have available capacity and IP resources.
- A virtual network for internal cluster communication is ready or will be created.
- If external access is needed, a gateway network and security group are prepared.
- CPU, memory, storage, and peak node counts for worker nodes have been estimated.
The create entry point is on the Kubernetes list page. Click "Create" to open the configuration page.
Configure the Cluster
The configuration page is divided into four sections: Region & Host Machine, Cluster Information, Worker Nodes, and Gateway.
Region and Host Machine
First, select the region group and host machine. The region determines the physical location of the cluster, while the host machine determines the available CPU, memory, storage, and bandwidth options. The platform automatically checks IP availability on the host machine and will block submission if resources are insufficient.
Cluster Name and Version
| Field | Description | Default |
|---|---|---|
| Cluster Name | A descriptive name for the cluster. Left empty to auto-generate | cluster-{randomID} |
| Kubernetes Version | The platform-supported version | 1.30 |
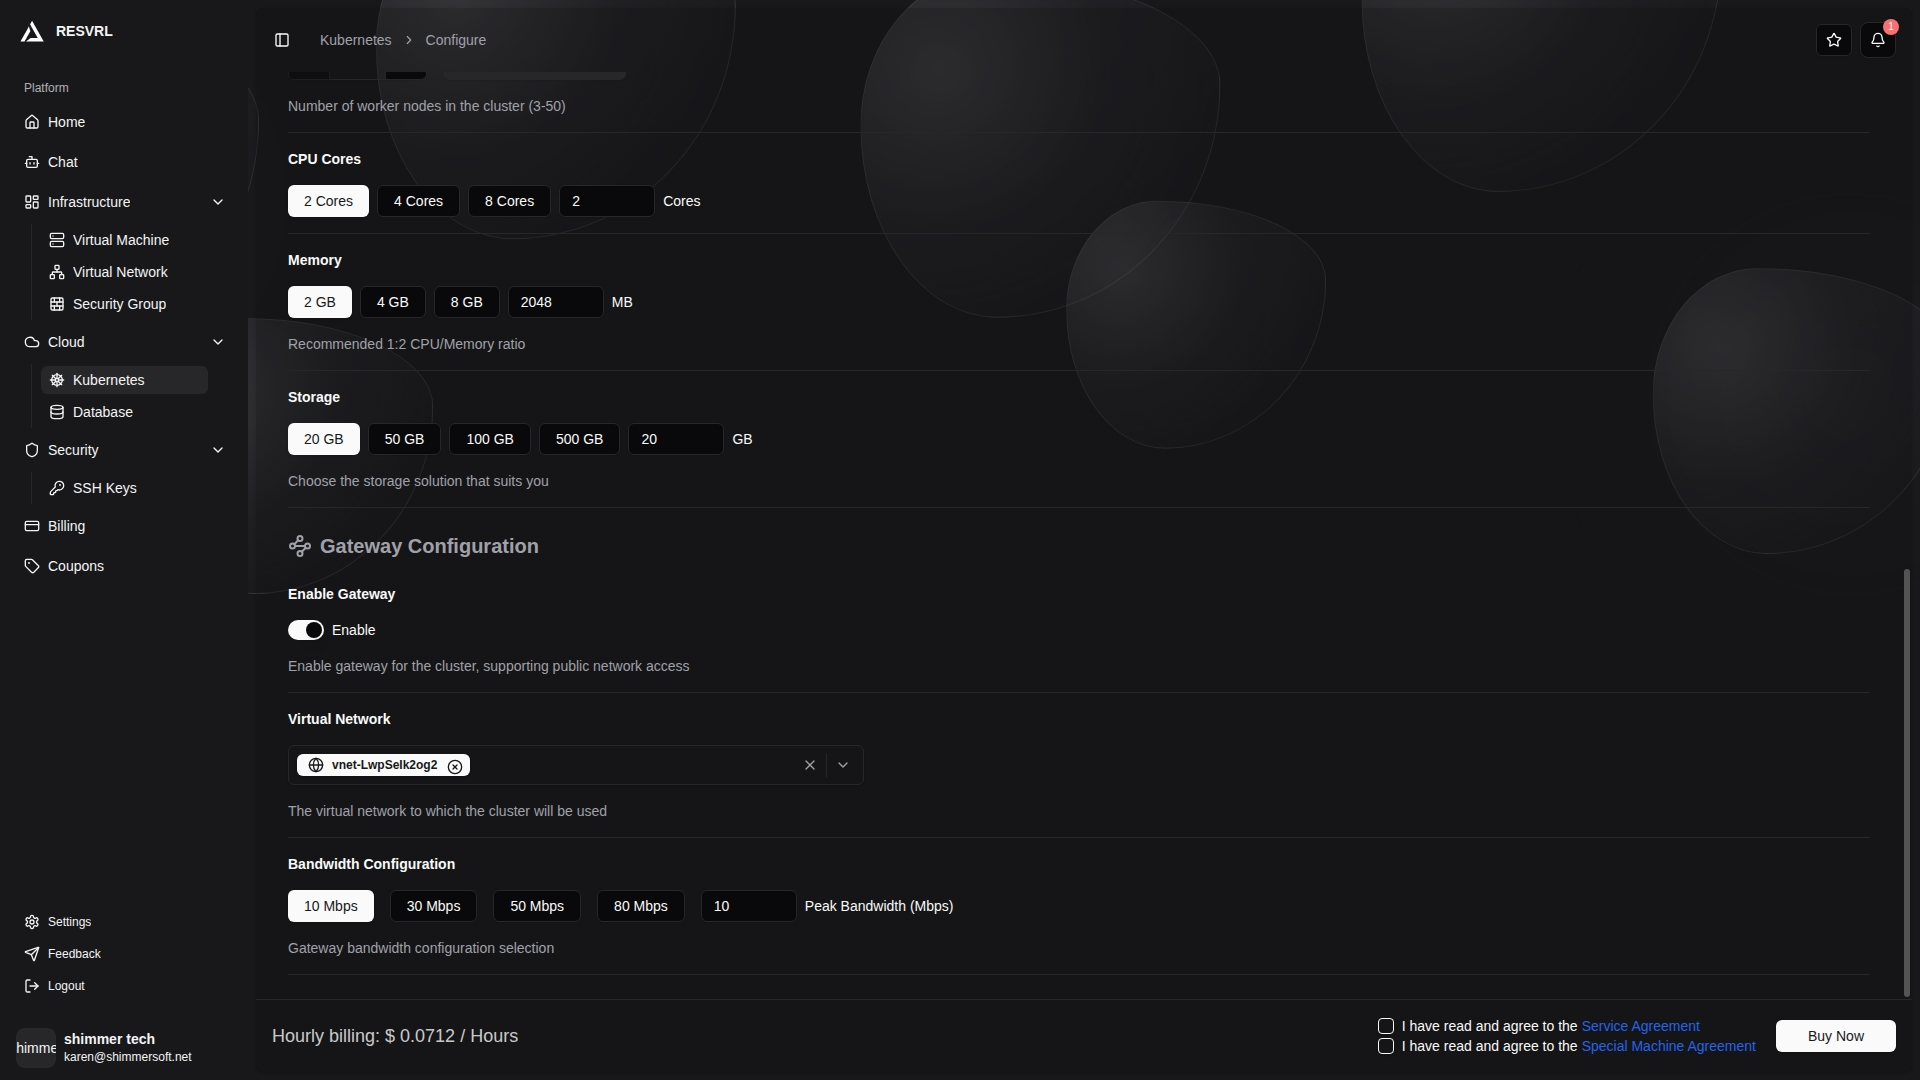
Cluster Network
The cluster network carries internal cluster communication and is required. The platform defaults to creating a new NAT network. You can also select an existing NAT network (Public Network type is not available). Each cluster should use a dedicated network and avoid sharing with unrelated environments.
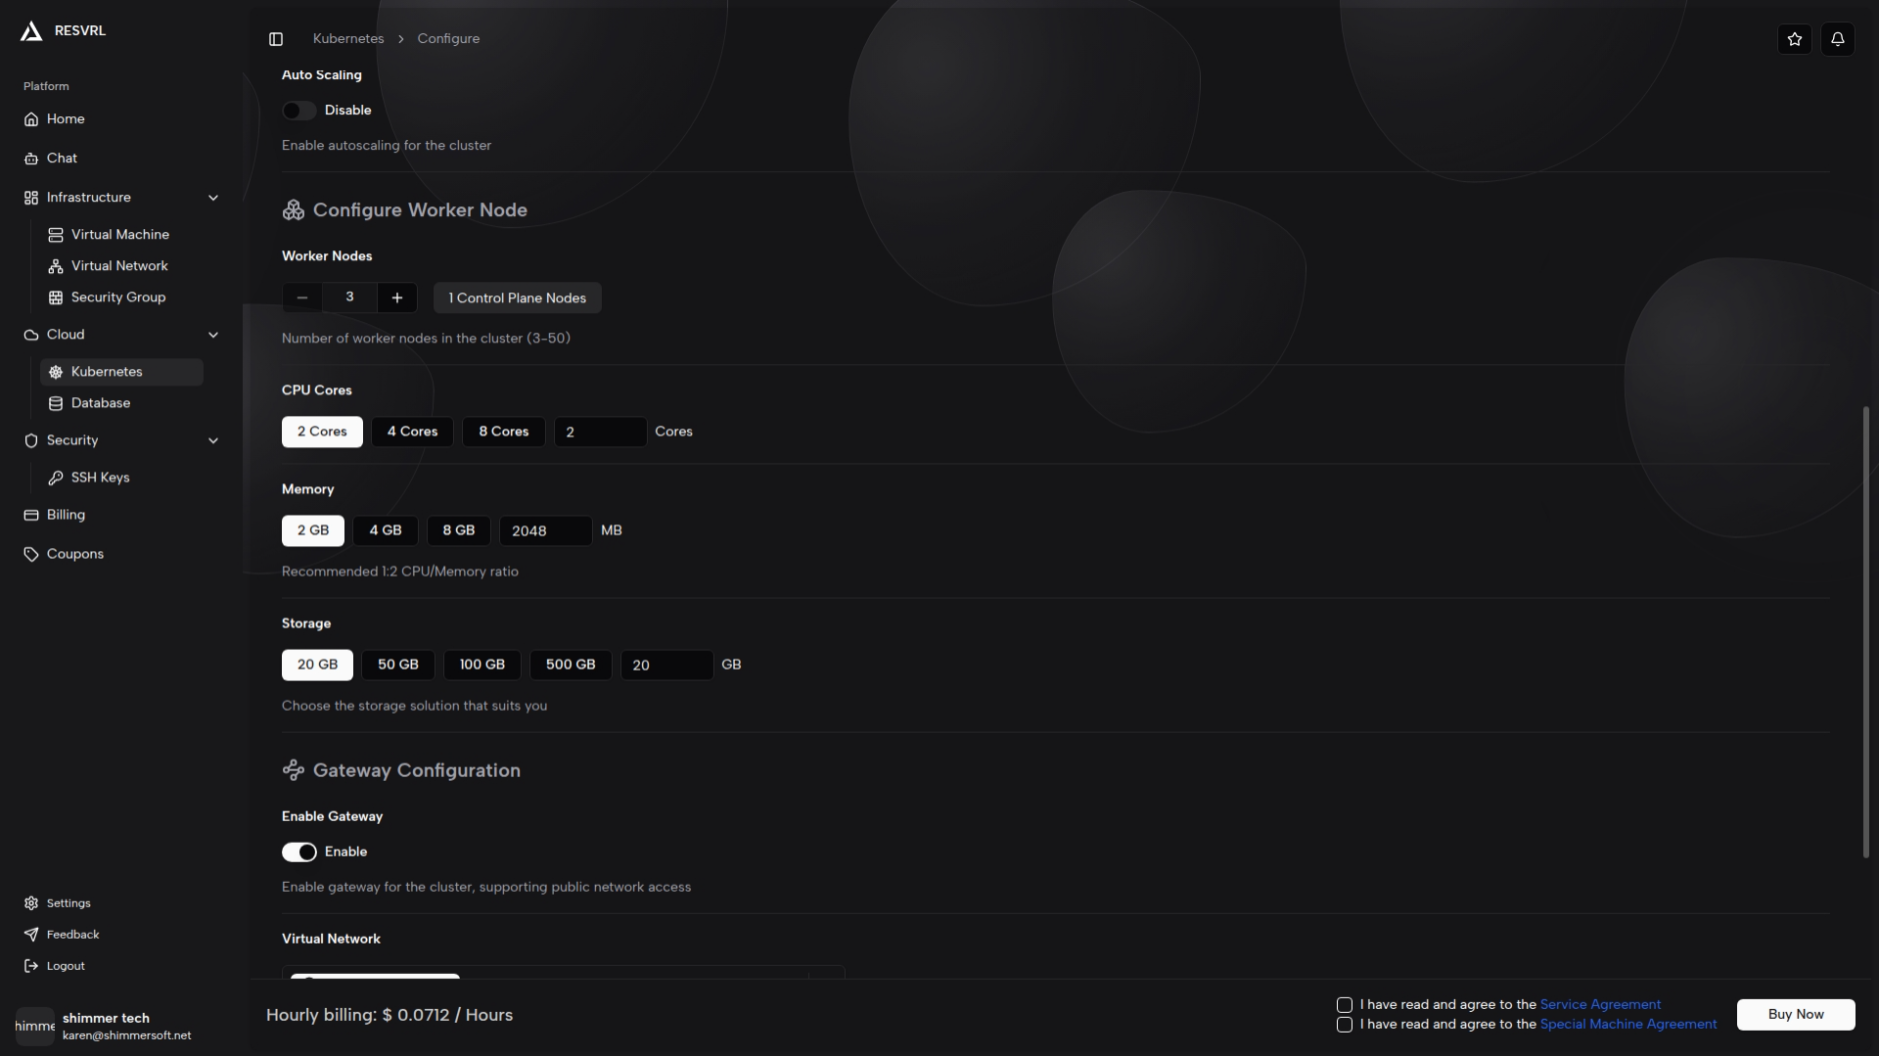
Auto Scaling
| Field | Description | Constraint |
|---|---|---|
| Enable Auto Scaling | Toggle to enable or disable auto scaling | Off by default |
| Maximum Nodes | The upper limit for auto-scaled nodes | Minimum is the current worker count, maximum is 50 |
When auto scaling is enabled, the cluster automatically adjusts the number of worker nodes based on load
Auto scaling is driven by the platform's scheduled tasks, not real-time reactive scaling. Auto-scaled nodes use the same specifications as the initial worker nodes.
Configure Gateway
The gateway is optional and used to handle external cluster traffic. Enable it only when services need to be accessed from outside the cluster.
| Field | Description | Default | Constraint |
|---|---|---|---|
| Enable Gateway | Toggle to enable or disable the gateway node | On | — |
| Gateway Network | The network associated with the gateway node | — | Required when gateway is enabled; NAT type is not available |
| Gateway Bandwidth | The bandwidth for the gateway node | 10 | Minimum 10, upper limit depends on host machine |
The gateway node is automatically configured by the platform (2 CPU cores, 2 GiB memory, 20 GiB system disk) and is assigned one IPv4 address automatically.
Confirm and Submit
After configuration, the bottom of the page displays the hourly pay-as-you-go price in real time. Any configuration change triggers a price recalculation.
Before clicking "Buy Now", complete the following:
- Agree to the Terms of Service and Privacy Policy.
- Ensure the account balance meets the minimum balance requirement (hourly rate × 30-day estimate).
After submission, the order confirmation page displays a cluster configuration summary:
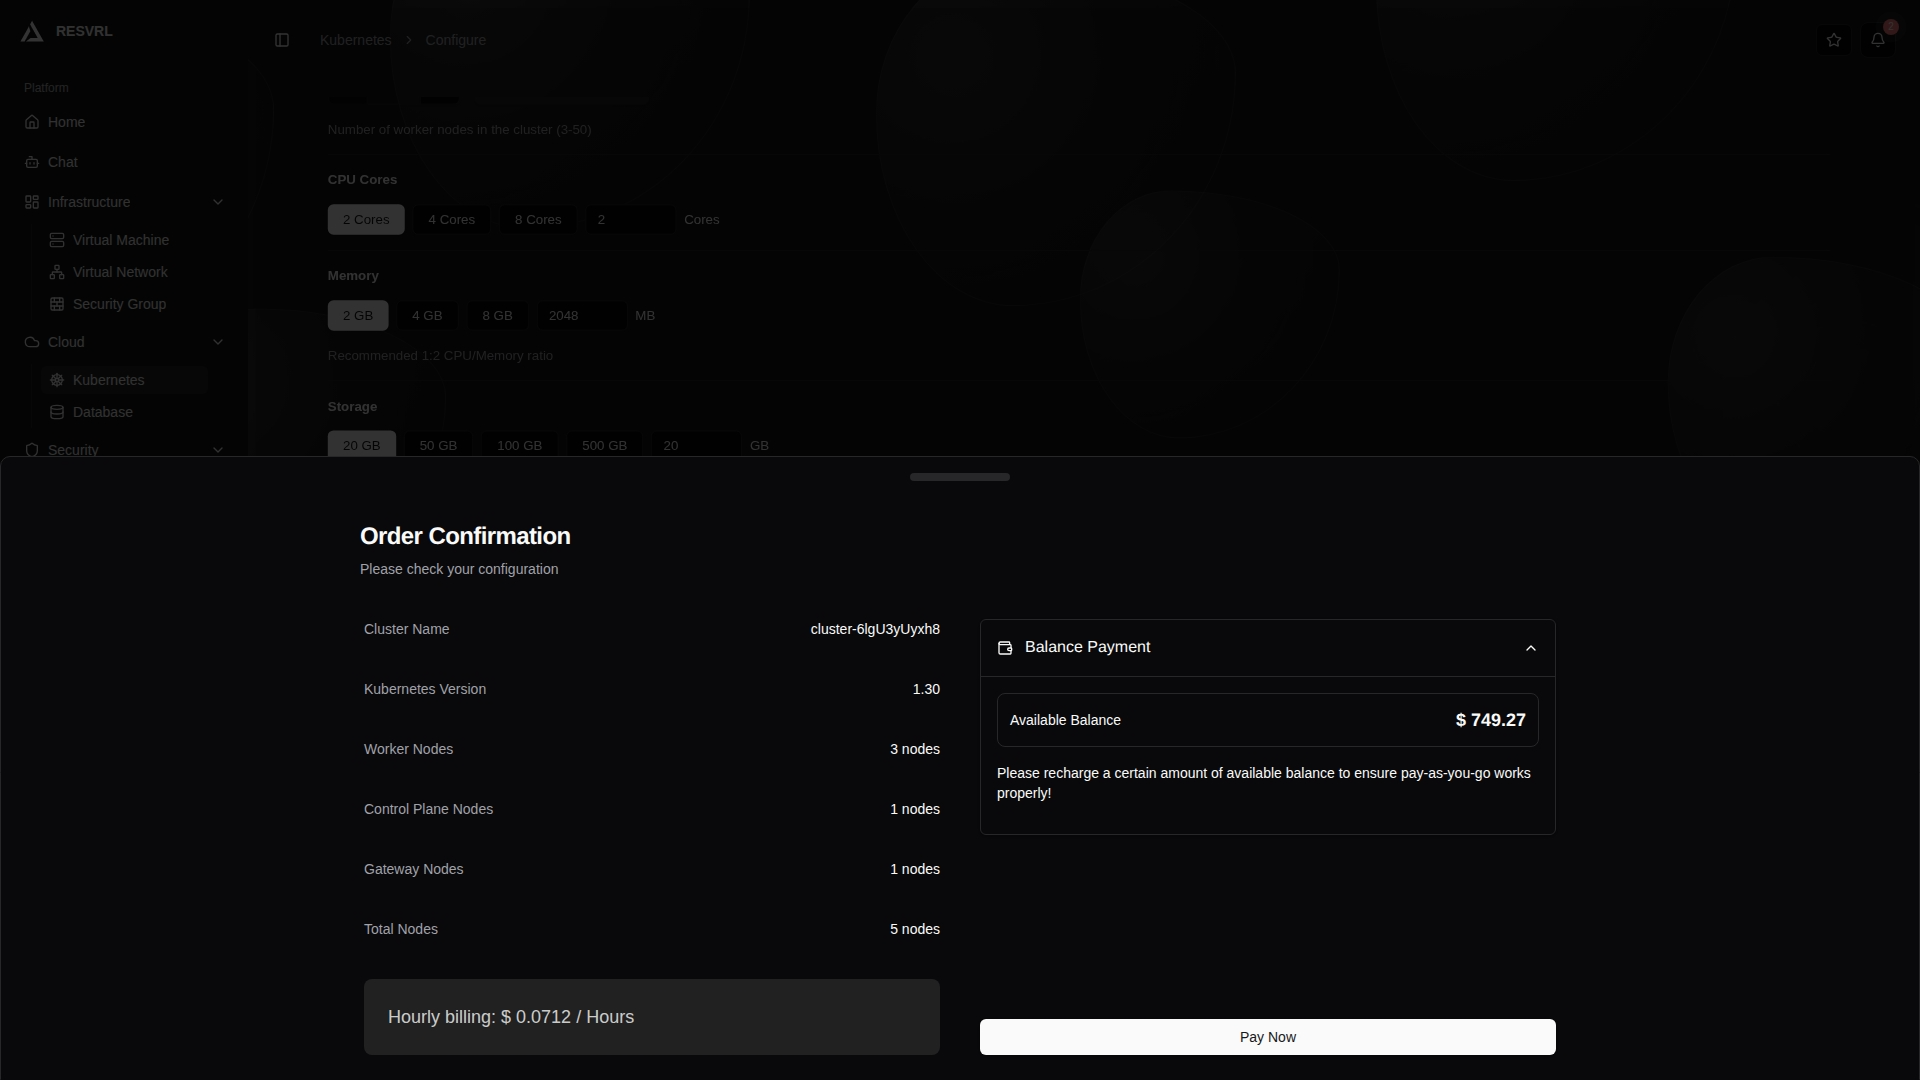
| Summary Field | Description |
|---|---|
| Cluster Name | The user-provided name or the auto-generated name |
| Kubernetes Version | The selected version |
| Worker Nodes | Number of Worker nodes |
| Gateway Nodes | 1 when gateway is enabled, 0 otherwise |
| Total Nodes | Sum of Worker and Gateway nodes |
Once confirmed, the platform begins creating the cluster.
Creation Process
Cluster creation follows a strict sequential order:
- Sequential creation: All nodes are created one by one. Parallel creation is not supported.
- Control Plane first: The first node created must be a Control Plane node.
- Single-node constraint: Only one node may be in the Creating state at any time.
- Failure halts progress: If a node fails to create, subsequent nodes will not be created and the cluster enters the Failed state.
Estimated creation time: Control Plane node initialization (including Kubernetes component installation and bootstrapping) takes longer, while Worker nodes joining the cluster are relatively faster. Actual time depends on host machine performance and network conditions.
Do not resubmit or refresh the page during creation. Wait for the platform to finish creating all nodes.
Post-Creation Verification
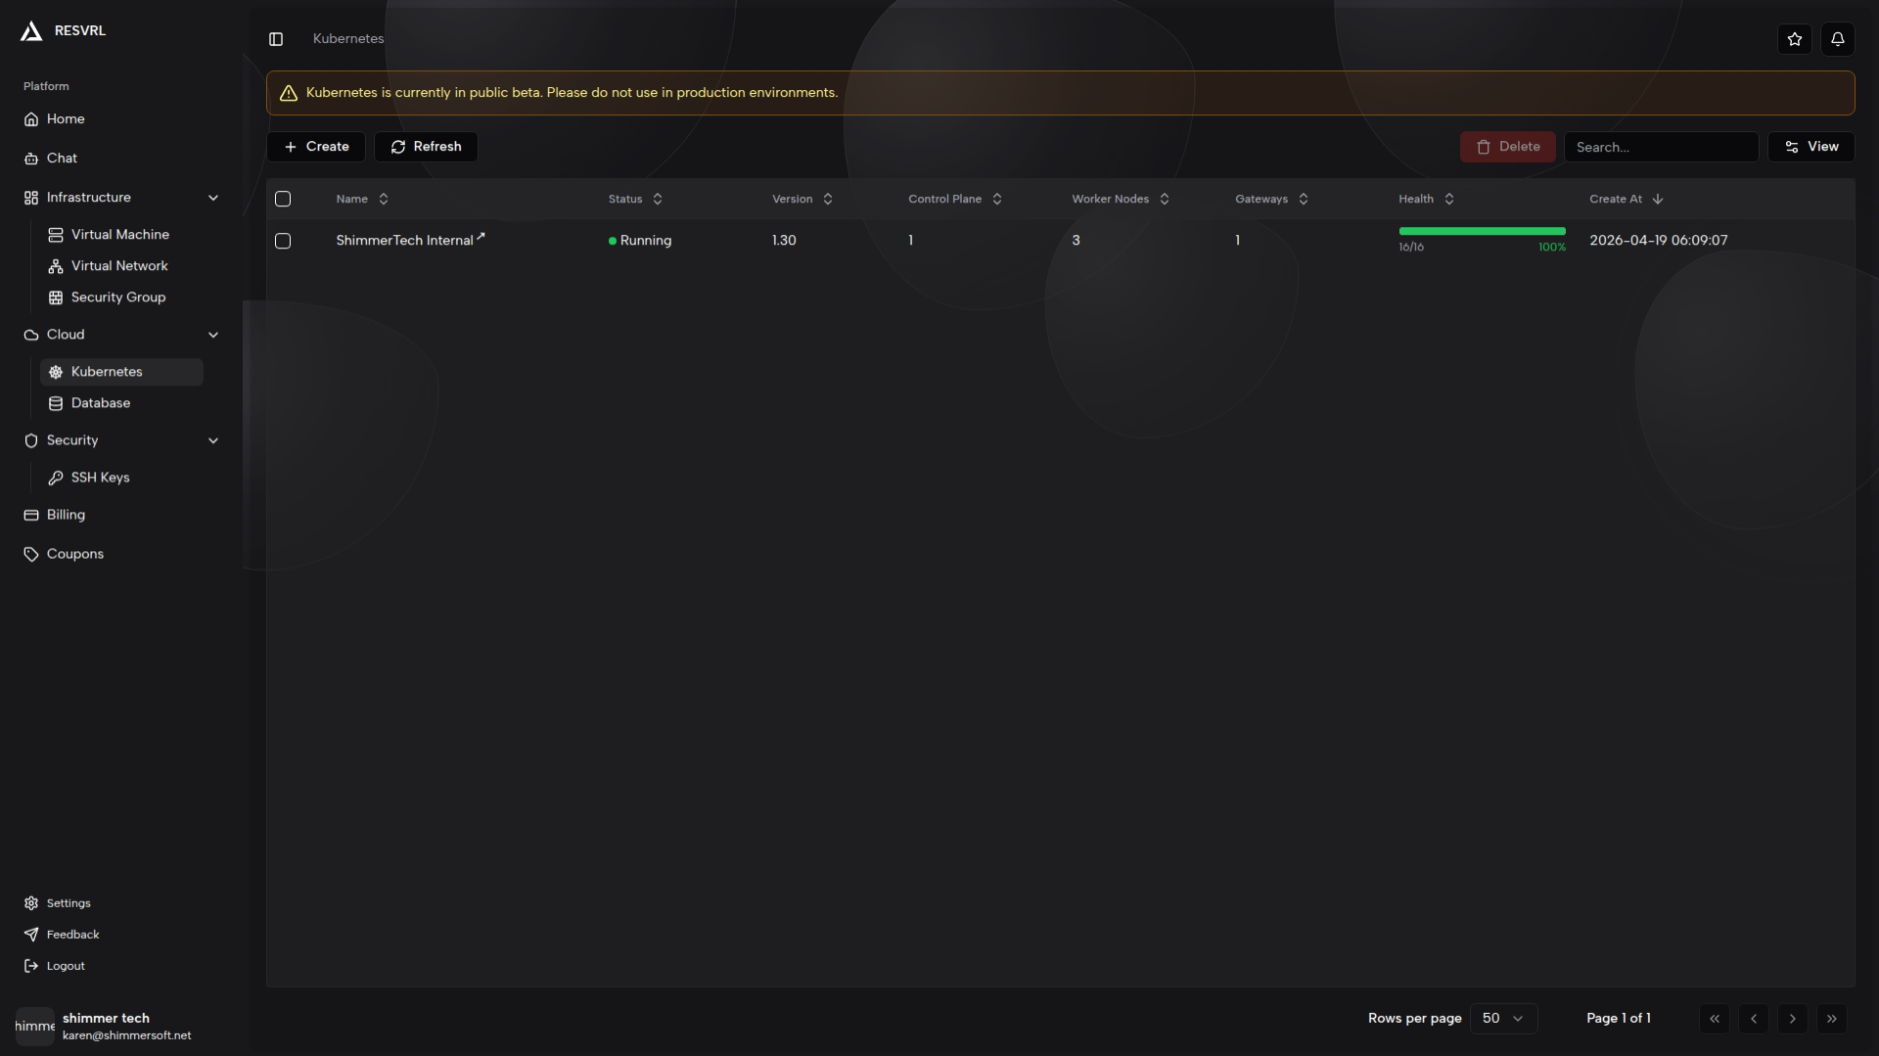
After submission, return to the Kubernetes list page to monitor the cluster status:
- Creating — The platform is sequentially creating nodes and components.
- Running — The cluster is ready; all nodes have been created.
- Failed — Creation failed. Check order status or contact support.
Once the cluster enters the Running state, verify all nodes are ready on the Overview page before deploying applications. Some data may not be fully synchronized on the first visit — refresh the page to update.
Related Documentation
This document was updated on 2026-04-25 09:00